Sunday, 31 August 2014

Seed Bar; Alternative Flapjack Recipe; Great snack, still a little naughty, easy to make!

Hullo,

So I like my carbohydrates, without them I feel hungry as hell. I love cereal bars and find they are a great mid-morning snack but with all the bad press they get for being high in sugar and preservatives I decided to choose my cereal bars more carefully. I came across a honey seed flapjack bar in Asda but to buy enough for the week would be a bit costly so I looked at the ingredients list and used it to create my own recipe. It has the same texture of flapjack but doesn't have any butter, golden syrup or added sugar. Despite this it is still very sweet because it is made with honey. So it's a great snack, still a little naughty, but a lot better for you than the processed bars. I took some into work and it went down very well and lots of my colleagues asked for the recipe so I thought I'd share it one here too. Here it is:

Ingredients:
  • 200-250g of honey (how much you use depends on how sweet you want it)
  • 100g oats
  • 200g seeds (I use pumpkin, sunflower, golden linseed and sesame, 50g of each)
With either:

For Plain Seed Bar:
  • 1 tsp vanilla extract, 1 tsp ground cinnamon and 1tsp ground nutmeg.
OR

For Fruit Seed Bar
  • 100g of sultanas or cranberries or whatever dried fruit you like.
Method:
  1. Pre-heat your oven to 180 degrees celsius.
  2. Line a 20cm square baking tin with baking parchment- this is really important as the honey makes the seed bar rather sticky and it will stick to the tin if you don't line it.
  3. Weigh 200-250g of honey in a heavy based pan and heat it gently. The honey will turn really runny and you will be able to mix the dry ingredients into it easier.
  4. Weigh out 100g of oats and you 200g of seeds in a bowl and tip this into the runny honey.
  5. Add which ever flavouring you are using (either the vanilla and spices or dried fruit) and mix well.
  6. Pour the mixture into the lined baking tin.
  7. Optional: I cover the tin with a layer of foil to stop the top from burning.
  8. Bake for 30 minutes.
  9. Remove from the oven and allow to cool completely.
  10. Once cool slice the seed bar into squares- I can get 12 squares out of mine. I wrap the squares in cling film and store them in a tupperware container. They last for quite a long time I have never had to throw it out. 

Hope you like it as much as we do!
xoxo

Sunday Morning can mean one thing only: Banana Pancakes!

Good Morning people!

Sunday morning can mean one thing only. It's banana pancake time.


My partner (Ordinary Boy, O.B) and I like to keep fit and O.B follows Chris Jones (a personal trainer who posts on you tube). A few months ago O.B watched Chris Jones' banana pancake video on you tube and that was that. We threw our ordinary pancake recipe out of the window and now we use this one every time. Ours is very slightly different from Chris Jones' version (we don't use the sweetener) but his video is where we got our inspiration from. Click here to watch his video: Chris Jones' Banana Pancakes Video

Here's our version of the recipe:

Ingredients (creates 6-8 medium sized pancakes):

  • 3 bananas
  • 2 egg whites
  • 2 eggs
  • 30g oats
  • 1tsp of cinnamon
Method
  1. Cut your bananas up and then mash them in a large bowl.
  2. Break two eggs into the mashed up banana.
  3. Separate two further eggs and add just the whites to the mixture.
  4. Measure and add 30g of oats to the mixture and mix slightly. 
  5. Add 1 or tsp of cinnamon to the mixture and mix slightly.
  6. Pour the mixture into a food processor and blend until smooth.
  7. At this stage we pour the mixture into a measuring jug as we find it easier to pour out into the frying pans.
  8. Put a little oil/cooking spray into a frying pan and heat until it's warm.
  9. Pour a little of the mixture into the frying pan and sprinkle a few cranberries on the top. We add our cranberries this way as it ensures each pancakes receives and even number of them.
  10. Cook the pancake until little bubbles start forming on the top and then get ready to show off your flipping skills! I am rubbish at flipping so in our house this is O.B's job!
  11. Cook the other side for a few seconds, this side should not need as long as the first side did, so keep a close eye on it.
  12. Put the pancake in the oven on a low temperature (we have the oven at 100 degrees celsius) to keep it warm while you cook the rest. We find it handy to have two small frying pans and cook two pancakes at a time. I am sure you'll find a method that works best for you.
  13. Serve! Because these pancakes are made from bananas they are very tasty without any toppings but for us banana pancakes are a real treat so we go all out and have honey, maple syrup, choc chips, sultanas and pecan nuts on the table to top the pancakes off with. Nom nom. A perfect breakfast if you have a busy day ahead of you; you won't need to eat until late in the afternoon!

Enjoy
xoxo

Saturday, 30 August 2014

Proper Birthday Cake!

Hullo,

So this week I will be making a birthday cake as it's my Mamma's 80th Birthday. This book (100 Fondant Models for Cake Decorators by Helen Penman) is a god send:


O.B bought me this as a pre-Christmas pressie to help me create some Christmas goodies. Needless to say it has come in very handy. Not only does it tell you how to create multiple fondant creatures, it also gives you recipes and lots of advice on what tools you'll need and how to best present your cakes. For example, I never thought of covering my cake boards until I read this book. Now I do it religiously and utilise the covered board as a blank canvas to further decorate and enhance the cake.

Anyway the point to this post is to share the fab recipe found in this book. It's a very dense mixture so if you're wanting a Victoria Sponge-like recipe keep looking. The purpose of this cake is for it to support lots of fondant decoration (like in the photo below) thus it needs to be a heavy cake.


A Victoria Sponge Cake, although it tastes deliciously light and airy, will not support lots of fondant. Thankfully I happen to love dense cakes, this tastes to me like proper vanilla birthday cake. Slice it up and stick a layer of vanilla buttercream and strawberry jam in it and nom nom! Reminds me of my childhood birthday cakes.

So here is the recipe for a 20.5cm (8inch) round cake or the same can be used for a 18cm (7inch) square cake. The recipe is take from the book100 Fondant Models for Cake Decorators by Helen Penman. If you fancy buying it, it can be bought on amazon for about £7. It definitely recommend buying it.

Ingredients

  • 425g of unsalted butter- take the butter out of the fridge ahead of mixing your ingredients. It's easier to cream the butter and sugar.
  • 425g caster sugar.
  • 7 large eggs- I break this all into one bowl and beat them lightly (just so the egg yolks break).
  • 550g self raising flour- sifted.
  • 1 tbsp of milk- I have forgot this before and the cake has been fine. If you add too much milk it's difficult it shape the mixture into your cake tin as described in the method below (see step 8 in the method below).
  • 2 and a half tsp of vanilla ESSENCE- I add this to the lightly beaten 7 large eggs. It must be essence to get the best vanilla flavour, sometimes people pick up extract and this does not have the same intensity in taste.
Method

  1. Preheat your oven to 180 degrees Celsius (350 degrees Farenheit). Each oven is different, you will know yours and the more you bake the more personalised your baking will become. My oven is pretty hot so I preheat mine to 160 degrees Celsius and towards the end I may drop it to 150 after checking the cake. I also place the top shelf as high as I can in the oven and put an empty baking tray on it. When ready I place my cake into the oven on the bottom shelf. As it takes a while to get the cake cooked all the way through these steps help prevent the outside from burning.
  2. Line your cake tin with baking parchment. Some people wrap the outside of the tin with multiple layers brown parcel paper as this can also help prevent burning but I find this isn't necessary for my oven with this recipe.
  3. Beat the softened butter and sugar together until light and fluffy. If you want to do it the old fashioned way (by hand) get ready for some achey arms, I prefer to use a hand whisk. If you're lucky enough to have a food mixer then this will help you no end at this stage!
  4. Add one egg at a time and beat into the mixture (I add a little bit of my lightly beaten eggs and vanilla extract mixture at a time). Add a little flour in between each addition of egg to prevent curdling.
  5. If you haven't added your vanilla extract into the egg mixture, then add it to the cake mixture now.
  6. Add the milk to the cake mixture and gently mix it in.
  7. Add the sifted flour a little at a time and fold in gently by hand. I recommend using a large metal spoon.
  8. Spoon the mixture into the prepared tin and smooth the top. I create a dip in the middle of the top of the mixture to make the mixture look like a doughnut. I do this because in the past I was smoothing the top of the cake and popping it straight into the oven. When I took the cake out it appeared cooked but the middle was hollow. I have found that creating this dip/hole in the middle of the mixture prevents this from happening.
  9. Cook for 1 hour 20 mins. 
  10. After the baking time has elapsed use a skewer to check the cake is cooked all the way through. Check the middle of the cake as this takes the longest to bake. If the skewer comes out clean, the cake is baked. 
  11. If the skewer does not come out clean give the cake another 10-15 minutes and repeat step 10. Keep cooking and checking the cake every 10-15minutes until it is cooked through.
  12. Once it's cooked through remove the cake from the oven and leave it to cool completely in the tin. I cover it with a tea towel and have left it overnight to cool before. Removing the cake from the tin too soon while it's still hot can compromise the shape (it may fall to pieces). Do not decorate the cake until it's cooled completely as your icing will melt.
Well there it is my favourite proper vanilla birthday cake recipe! Love it! Hope you do too!

xoxo


What to do with beautiful flowers you'd like to keep forever

Hullo!

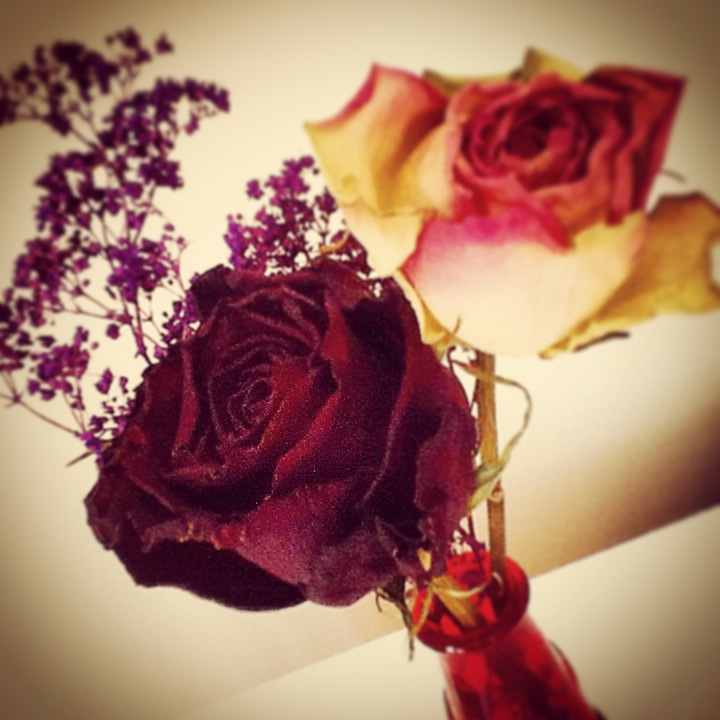
Recently my partner (who shall be known as ordinary boy or O.B for short) celebrated our engagement. Family and friends sent us lovely flowers which I managed to keep alive for two weeks! Now that was a shock. I normally kill plants within a day! But I wanted to keep them even longer and that's when I remembered a little trick my Mum taught me. Dry them out! My Stepdad usually bought my Mum roses for valentines day and one year I remember them disappearing and reappearing about a week later looking very different. My Mum explained at she had left the to dry out for a week and then placed them back in a vase so they'd keep for longer. I must admit I have done this loads of times but normally with roses. If anyone has any examples of other flowers being dried please post some pics so I can see.


This is how my Mum (and now I) do it. It's really easy, creates a great effect and the flowers can be kept for years. Just remember to dust them!

Step one: Select the flowers you would like to dry out whilst they are still at their best. Put the stems together and tie them together. I use a bobble, but I leave a little slack in it to enable me to tie them up. You could use string if you prefer though.

Step two: In a dry room or place, use whatever you tied the stems together with, to hang the flowers up so that they hang upside down (see pic below). My Mum uses her boiler room but I do not have one so I use the window of my spare bedroom which gets a lot of light. You may have to be inventive with how you hang the flowers up. As you can see from my picture I use the bobble to hang the flowers on a clothes hanger which is then hung in the window. I am sure you'll find a way.


Step three: This is the boring bit. Leave it there for about 3 days to a week. How long seems to depend on how dry the room is.

Step four: Now for the exciting bit. Remove your flowers but be careful as, now they are dry, if you are heavy handed the petals may flake and fall off. Finally arrange them in a vase! Beaut!


xoxo


Hi; Hello; Hiya; Ay Up; Hola; Bonjour; Ciao; Hallo; Hej; Witam; Ola; etc.

Hullo and welcome to my blog.

As the blog title suggests I am simply an ordinary girl making my way through 'life'. Just as I am sure you experience, in my world there are both ups and downs. As I have aged I have realised that there is far too much focus on the negative aspects of life. This self evaluation, by focusing on the negatives, is necessary to enable us to further better ourselves and therefore self evaluation has a very vital role in our world. However, we must remember to celebrate and appreciate the positives. As a teacher, finding a balance between what a student did well and what they can do to further improve is imperative if I wish to foster success. Yet time and time again I see not only my students but my colleagues, my family members and my friends of all ages fixating on the bad while the good passes them by.

This is why I decided to start this blog to share my 'positives'. The little things that probably seem small, and possibly sometimes irrelevant, but make my life a good one. I am hoping that by maintaining this blog I will be able to ensure that I really take notice of the positives around me and I hope it helps you do the same.